To take a screenshot, press Windows + Shift + S on Windows, Command + Shift + 5 on Mac, or the side button + volume up on an iPhone with Face ID. On Android, press Power + Volume down. On a Chromebook, press Shift + Ctrl + Show windows.
That's the short version.
Below you'll find the full step by step guide for every device, plus a comparison table, troubleshooting fixes, and an FAQ.
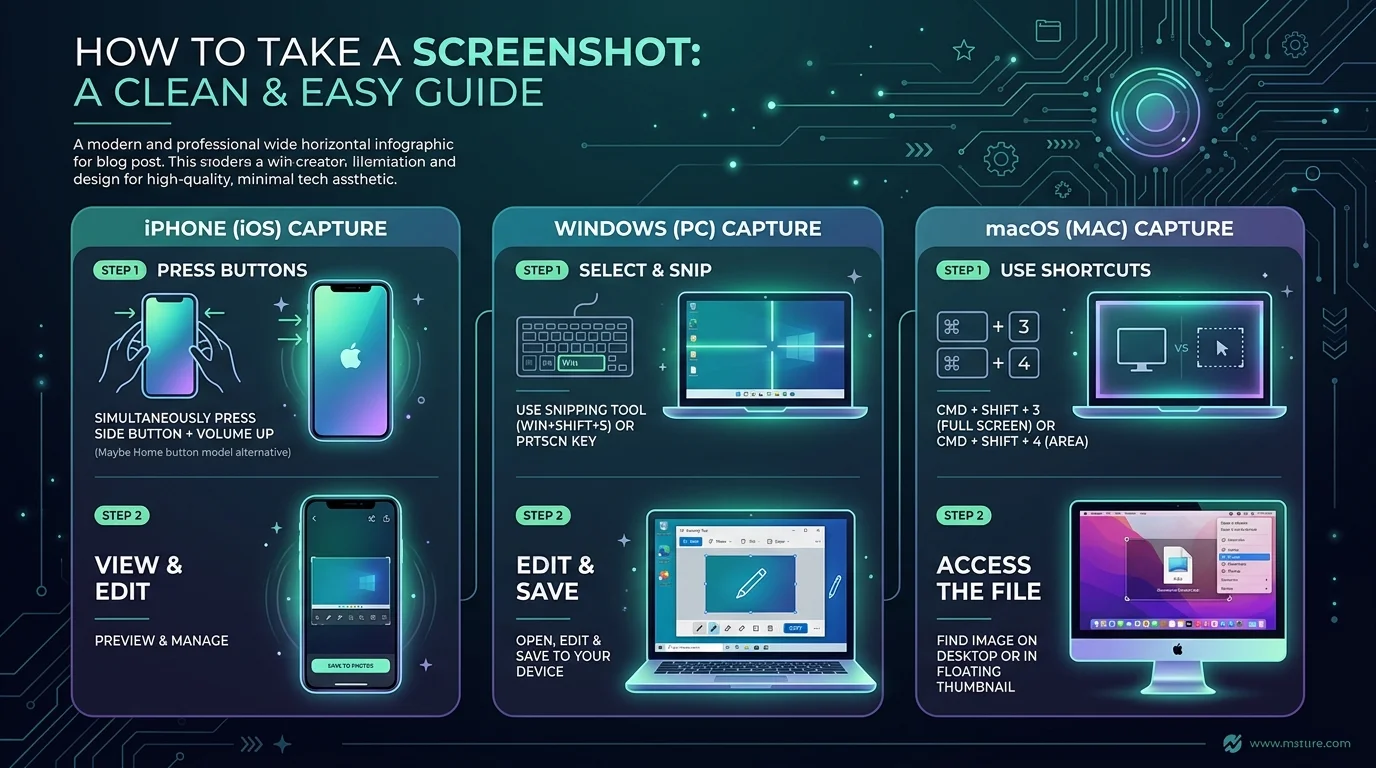
Why Most People Struggle to Take a Screenshot
I once lost a client report because I couldn't capture one error message.
Ridiculous, right?
The problem is that most of us learn exactly one method, then freeze when we switch devices. So I tested every major platform and checked the official documentation. In this guide, you'll learn the fastest screen capture shortcut for each device, where your files end up, and how to edit and annotate them like a pro.
Let's dive in.
Screenshot Shortcuts Compared: Every Platform at a Glance
Before the detailed steps, you need a cheat sheet. This table shows the main keyboard shortcut, where your screenshot is saved, and what you can do next. Bookmark it, because you'll come back to it whenever you pick up an unfamiliar device. Every shortcut below comes from official or well documented sources, which I link in each section.
Platform | Main shortcut | Where it saves | Built in editing |
|---|---|---|---|
Windows 11 | Windows + Shift + S | Screenshots folder | Snipping Tool markup, Paint |
Windows 11 (full screen) | Windows + Print Screen | Pictures > Screenshots | Open in any editor |
Mac | Command + Shift + 5 | Location you set in Options | Markup tools |
iPhone (Face ID) | Side button + Volume up | Photos app | Markup, crop |
Android | Power + Volume down | Photos or Gallery | Edit and Share buttons |
Chromebook | Shift + Ctrl + Show windows | Folder you select, plus clipboard | Review, edit, share |
Linux (GNOME) | Print Screen | Pictures folder | Save dialog, clipboard |
Chrome full page | Ctrl + Shift + P, then "Capture full size screenshot" | Downloads folder | Any image editor |
How to Take a Screenshot on Windows 11
Windows gives you the most options of any platform. You can capture a rectangle, a window, the full screen, or a freeform shape. Then you can mark it up right away. Microsoft's own support page covers the Snipping Tool in detail. I'll give you the fast version, plus a few settings worth changing today.
Use the Windows + Shift + S Shortcut
This is the method I use daily. It's fast, and it gives you control over exactly what you capture. The whole process takes about three seconds once you've done it twice, so try it right now while you read.
Press Windows + Shift + S.
Your screen dims and a small toolbar appears.
Pick rectangle, window, full screen, or freeform.
Click the notification to annotate and share.
Microsoft confirms that a captured snip is automatically saved to your Screenshots folder.
Working across displays? Our guide on how to set up two monitors helps you pick the right screen before you capture.
Use the Print Screen Key
Prefer the old school way? Print Screen still works, and it's great when you just need the whole display. Press Windows + Print Screen, and Windows saves the image to Pictures > Screenshots. No clicking required.
Pro tip: turn on the setting that lets the Print Screen button open screen snipping. Then one key does everything.
Take a Delayed Screenshot
Some things disappear the moment you move your mouse, like dropdown menus and tooltips. That's where a delay timer saves you. In Snipping Tool, select Delay and choose a time such as 5 seconds. Set it, open your menu, and wait.
Need video instead? Press Windows + Shift + R to capture a video clip.
How to Take a Screenshot on a Mac
Mac makes this easy. One shortcut opens a complete screenshot toolbar with options for stills, screen recording, a timer, and more. Apple's guide explains how to take a screenshot on your Mac, and the steps below match it. You'll be done in under ten seconds. Want every Mac trick in one place? Read our dedicated guide on how to screenshot on Mac.
Press Command + Shift + 5.
Choose to capture the entire screen, a selected window, or a portion of a window.
Click Options to set a timer or change the save location.
Click Capture.
Next, a thumbnail appears in the corner. Click it to use Markup tools, or drag it straight into a document.
How to Take a Screenshot on iPhone
Your iPhone is probably your most used screen capture device. Think receipts, directions, and chat threads. The exact buttons depend on your model, but the process is always one quick press. Apple's official page for taking a screenshot on iPhone covers every model, and iOS 26 adds instant editing.
iPhone with Face ID
Press the side button and the volume up button at the same time, then release quickly. That's it.
iPhone with a Home Button
Press the side button and the Home button together, then release.
After capturing, iOS 26 shows quick tools to draw with Markup, crop, share, or save. On iOS 18 and earlier, you'll see a thumbnail in the lower left corner instead.
Take a Full Page Screenshot on iPhone
Want an entire webpage? Take a screenshot, tap the thumbnail, then choose Full Page. You can then save it as a PDF in Files. I use this for long articles all the time. If you need a different format later, try our free tool guide to convert JPG to PDF.
How to Take a Screenshot on Android
Android works a little differently across brands. A Pixel, a Samsung, and a Xiaomi all share the same core idea, but menus vary. Google documents the standard approach on its support page for taking a screenshot or recording your screen on Android. Here's the simple version.
Open the screen you want to capture.
Press the Power and Volume down buttons at the same time.
Check the preview at the bottom left.
Tap Share or Edit.
Take a Scrolling Screenshot on Android
Need a long page or chat? Scrolling screenshots work on Android 12 and up for most scrollable screens. After you take a normal screenshot, tap Capture more.
If the shortcut fails, visit your phone manufacturer's support site, because some brands change the buttons.
How to Take a Screenshot on a Chromebook
Chromebooks have a clean Screen Capture tool built in. You can grab the full screen, a partial area, or a single window, and you can even record. Google's page on taking screenshots on a Chromebook walks through each option.
Press the Screenshot key if your keyboard has one.
If not, press Shift + Ctrl + Show windows.
Choose full screen, partial, or window.
A nice touch: screenshots and recordings are automatically copied to your clipboard. You can paste right away, and our guide to copy and paste on a Chromebook shows you the shortcuts.
How to Take a Screenshot on Linux
Linux users, you haven't been forgotten. The GNOME desktop ships with a capable screenshot and screencast tool. The Rocky Linux GNOME guide lists the shortcuts clearly, and the official GNOME Help page covers the basics. Keep in mind that other desktops may differ.
Print Screen: opens the interactive screenshot interface
Alt + Print Screen: captures the active window
Shift + Print Screen: lets you select an area
Ctrl + any of these: copies the image to the clipboard instead of saving it
How to Take a Full Page Screenshot in Chrome
Sometimes you need an entire website in one image. Normally that means installing an extension, and our roundup of the best productivity Chrome extensions can help if you prefer that route. But Chrome DevTools can do it for free. The Chrome team's DevTools tips mention full page and element capture, and Tom's Guide lays out the steps.
Press F12 to open DevTools.
Press Ctrl + Shift + P (or Cmd + Shift + P on Mac).
Type screenshot.
Choose Capture full size screenshot.
Your image downloads automatically. One catch: very tall pages can get cut off past the browser's image limit.
Screenshot Not Working? Quick Troubleshooting Fixes
Even simple tools fail sometimes. When a screenshot won't save or paste, it's usually one of a handful of causes. Before you panic, run through this short list. Most issues take under two minutes to fix, and I've seen each of these trip up experienced users.
Can't paste it? Use Windows + Print Screen so the file saves to your folder instead of just the clipboard. If you see a work restriction message, read our fix for organization data cannot be pasted here.
Can't find it? Check Pictures > Screenshots on Windows, or the Photos app on iPhone.
Deleted by accident? Our guide on how to recover deleted files can help.
Overlay software interfering? Third party capture or overlay apps can block screenshots. Disable them temporarily.
Android shortcut ignored? Your manufacturer may use a different button combo.
Outdated system? Run your pending updates, then try again.
Pro Tips to Make Every Screenshot Look Professional
Capturing is only half the job. A messy image can sink an otherwise great tutorial, blog post, or support ticket. So spend thirty seconds polishing before you publish. This is my personal checklist, and you're welcome to steal it.
Crop tightly and show only what matters.
Annotate with arrows, boxes, and short labels.
Hide private details like emails and account numbers.
Use descriptive file names, such as windows 11 snipping tool.png.
Add alt text for accessibility and image SEO.
Back up important captures. See our picks for the best photo backup solutions.
Search by image. A screenshot can power a Google reverse image search when you need to find a source.
Frequently Asked Questions About Taking Screenshots
How do I take a screenshot on Windows 11?
Press Windows + Shift + S to open the Snipping Tool overlay. Choose a rectangle, window, full screen, or freeform capture. Your snip is automatically saved to your Screenshots folder. You can also press Windows + Print Screen to save the whole display instantly.
Where do screenshots go on Windows?
Snipping Tool saves captures to your Screenshots folder automatically. When you use Windows + Print Screen, the file lands in Pictures > Screenshots. You can change the default folder in Snipping Tool's settings.
How do I take a scrolling screenshot?
On Android 12 and up, take a normal screenshot, then tap Capture more. On iPhone, tap the thumbnail and choose Full Page. On a desktop browser, use Chrome DevTools and run "Capture full size screenshot."
How do I take a screenshot on a Mac?
Press Command + Shift + 5 to open the screenshot toolbar. Choose full screen, window, or selected portion, then click Capture. A thumbnail appears so you can mark it up or share it.
How do I take a screenshot on an iPhone?
On models with Face ID, press the side button and volume up button together, then release. On Home button models, press the side and Home buttons. On iOS 26, you can edit and save immediately.
Can I take a screenshot on a Chromebook?
Yes. Press the Screenshot key, or use Shift + Ctrl + Show windows. Then pick full screen, partial, or window. Your capture is also copied to the clipboard automatically.
Ready to Level Up Your Content Workflow?
Look, built in tools are great for quick grabs. But if you create guides, tutorials, or documentation every week, you deserve a smarter system around them.
Great screenshots are just the start. Clear visuals, helpful guides and strong links work together to grow your traffic. At Backlynkflow, we publish practical, step by step guides like this one every week, so you can learn faster and publish with confidence.