To change your WiFi channel, log into your router's admin panel through a browser, open the Wireless or WLAN settings, and select a new channel from the dropdown menu. The whole process takes under five minutes, requires no new hardware, and can immediately fix slow speeds caused by wifi channel congestion.
I'll walk you through exactly how to do this, which channel to actually pick, and the mistakes that trip most people up. Let's get into it.
What Is a WiFi Channel (And Why It Matters)
A wifi channel is a narrow slice of radio frequency that your router uses to send and receive data. Every router nearby is broadcasting on one of these slices, and when too many networks share the same one, you get interference. Understanding this is the foundation for everything else in this guide.
Picture a highway split into lanes. Each lane is a channel. Your router picks a lane, and every device in your home drives through it. According to TeamViewer's networking guide, a WiFi channel exists specifically to separate networks and reduce crosstalk between them, much like lane markings keep cars from colliding.
The problem is there aren't that many lanes to go around, especially on older hardware.
Why WiFi Congestion Happens
Here's the part most guides skip.
The 2.4GHz band has only three non-overlapping channels, channels 1, 6, and 11. As Data Alliance explains, the US allows 11 usable channels on 2.4GHz, but only those three don't interfere with their neighbors. Everything in between overlaps, which makes congestion worse, not better.
So if you're in an apartment building with 30+ networks nearby, odds are a bunch of them are crammed into those same three lanes. That's the real cause behind most slow wifi speed and dropped-connection complaints, not your internet plan.
Does Changing Your WiFi Channel Actually Help?
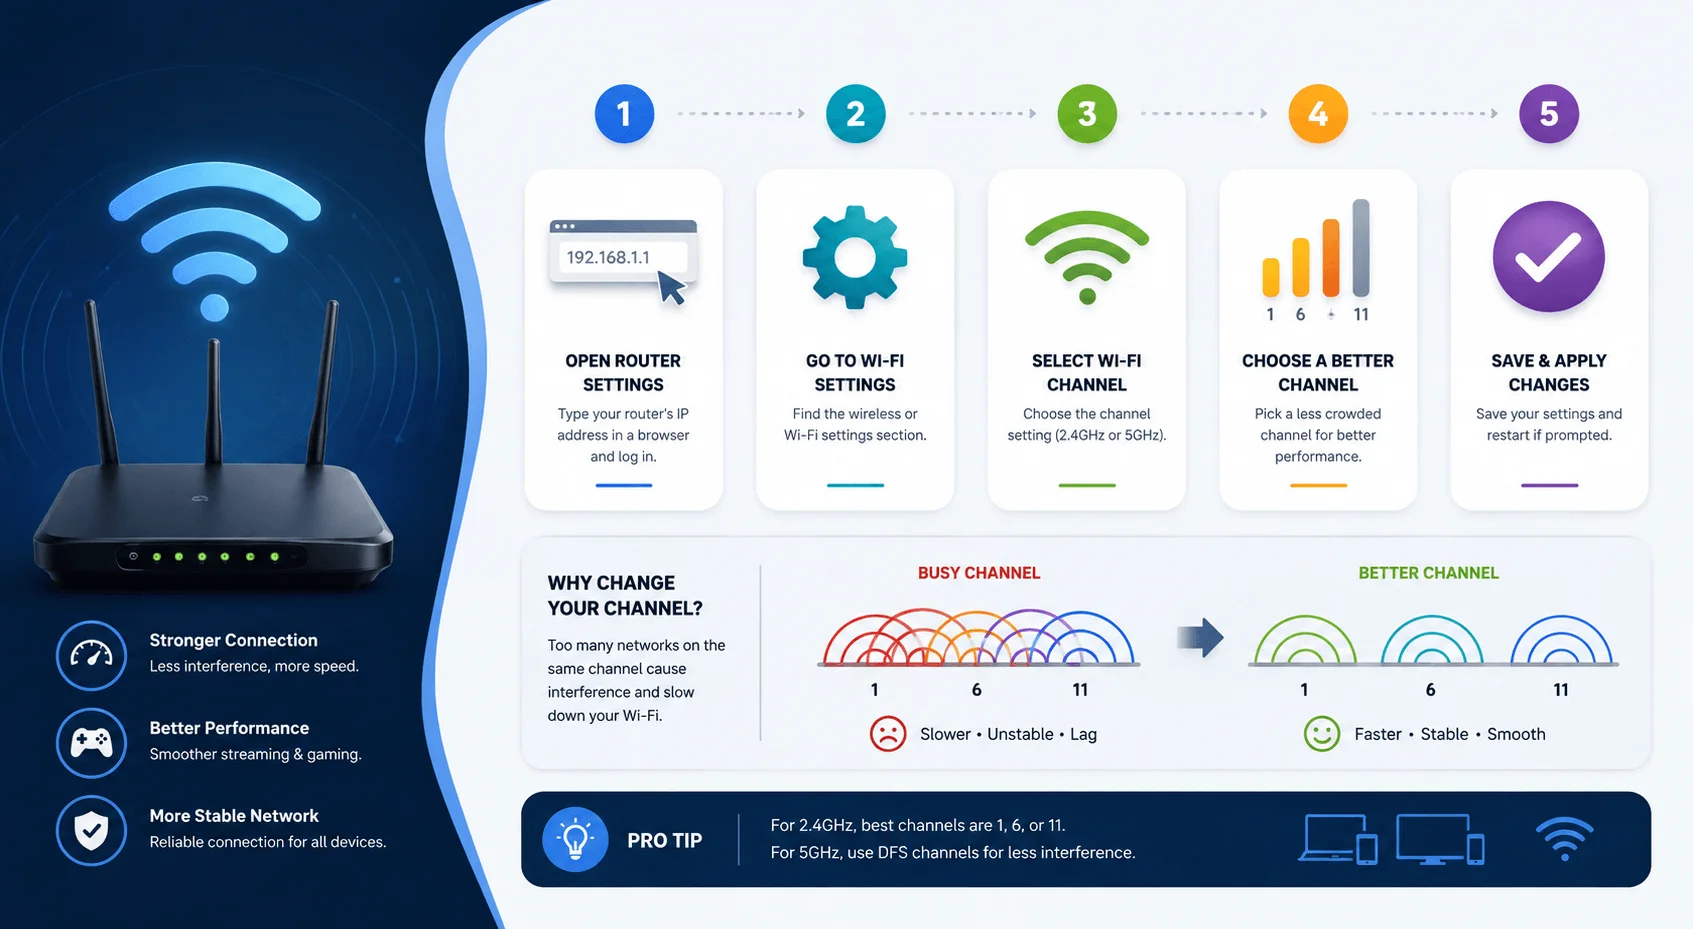
Yes, and often the improvement is immediate. Switching to a less-congested channel removes your traffic from a crowded lane and gives it a clearer, more direct path.
One thing worth clearing up: this is a performance fix, not a security fix. If security is your goal, that requires a different set of steps involving your WiFi password and firmware, not your channel.
Step 1: Find Your Router's IP Address
You'll need this to reach your router admin panel. Most routers print their default IP on a sticker on the device itself, typically 192.168.1.1 or 192.168.0.1.
No sticker? Here's how to find it:
On Windows:
Open Command Prompt
Type
ipconfigand press EnterLook for "Default Gateway"
On Mac:
Go to System Preferences → Network → Advanced → TCP/IP
Your router's address is listed as the router IP
On iOS or Android:
Open Settings → WiFi
Tap your network name
Look for "Router" or "Gateway"
MakeUseOf's guide also notes Mac users can find this via Terminal using netstat -nr | grep default.
Step 2: Log Into the Admin Panel
Type the IP address directly into your browser's address bar, not the search bar. You'll hit a login screen asking for your router admin credentials, which are separate from your WiFi password.
Common default logins:
Username:
adminPassword:
adminorpassword
HelloTech's guide suggests trying a blank username or password too, since some manufacturers ship it that way.
Step 3: Open Wireless Settings
Look for a tab called Wireless, WLAN, or Radio Settings. You may need to click into Advanced Settings first. Reolink's guide confirms the exact path varies by brand, but the destination is always the same, a menu showing band, channel, and channel width together.
How Router Menus Differ by Brand
Since menu labels vary, here's a quick reference:
Router Brand | Menu Path | Typical Label |
|---|---|---|
TP-Link | Advanced → Wireless → Wireless Settings | Channel |
Netgear | Advanced → Wireless Setup | Channel |
ASUS | Wireless → General | Control Channel |
Xfinity/Comcast Gateway | Connection → WiFi | Channel Selection |
Google Nest WiFi | WiFi app → Settings → Advanced | Channel |
If your brand isn't listed, search "[your router model] change wifi channel" for the exact click path.
If your brand isn't listed, search '[your router model] change wifi channel' for the exact click path. If you're on an Xfinity gateway, note that some settings may be managed through the xFi app rather than the browser panel, worth checking if you're also curious what xFi Complete includes
Understanding Channel Width
Next to the channel dropdown, you'll usually see Channel Width or Bandwidth. Don't skip this.
20 MHz — narrowest, least interference, best for crowded buildings
40 MHz — wider and faster in open environments, more prone to interference
80 MHz+ — mainly relevant on 5GHz and 6GHz for high-bandwidth use like streaming or gaming
If you live somewhere dense, stick with 20 MHz. You trade a bit of theoretical speed for a lot more reliability.
Step 4: Choose the Best WiFi Channel
On 2.4GHz: pick channel 1, 6, or 11. Anything else overlaps with its neighbors.
On 5GHz: you have more room to work with. A Surfboard community forum thread from networking specialists recommends starting with channel 149 or above if you don't have WiFi 6E devices, or channel 36 if you do. Some routers also offer DFS channels (52–64 and 100–140), which are cleaner but can be interrupted if you live near an airport or weather radar, since they share spectrum with radar systems.
On 6GHz: if your router and devices support WiFi 6E or WiFi 7, this band offers seven 160MHz-wide non-overlapping channels, according to TP-Link's support documentation. That means congestion is far less likely here than on 2.4GHz or 5GHz, since there's simply more spectrum to spread across.
Use a WiFi Analyzer First
Guessing works in a pinch, but scanning is smarter. Tools like NetSpot show a channel graph of every network around you.
Download and install the analyzer
Open the 2.4GHz or 5GHz tab
Deselect your own network and view everyone else's
Identify the least crowded channel
Apply it in your router settings
Step 5: Save and Reboot
Click Save or Apply. Your router will likely reboot to apply the change, usually within 30 seconds to two minutes. A brief disconnect is normal. Reconnect your devices afterward and give the network a few minutes to settle.
Common Mistakes to Avoid
Picking an overlapping 2.4GHz channel. Anything besides 1, 6, or 11 can make interference worse.
Ignoring channel width. A wide width in a crowded building often backfires.
Confusing router login credentials with your WiFi password. These are two separate things entirely.
Skipping the analyzer step. Picking channel 6 by default isn't wrong, but scanning first means you're picking the actual best option for your specific location.
Assuming it fixes security. It doesn't. That's a separate task involving your password and firmware.
FAQ: Changing Your WiFi Channel
How do I change my WiFi channel?
Log into your router's admin panel at its IP address, usually 192.168.1.1 or 192.168.0.1, go to Wireless settings, and select a new channel from the dropdown.
What is the best WiFi channel for 2.4GHz?
Channels 1, 6, and 11, since they're the only non-overlapping options on that band.
What's the best 5GHz channel?
Start with channel 149 or above if you don't use WiFi 6E devices, or channel 36 if you do.
Does 6GHz need channel management too?
Less so. With seven non-overlapping 160MHz channels, congestion is rare, but only WiFi 6E and WiFi 7 devices can use this band.
Does changing the WiFi channel improve speed?
Yes, often significantly, especially if you're sharing a congested channel with several nearby networks.
Does changing my WiFi channel make my network more secure?
No. It affects performance and interference only, not encryption.
How often should I change my WiFi channel?
No fixed schedule. Rescan and adjust if your speed drops again, especially after new networks appear nearby.
Wrapping Up
Changing your wifi channel is one of the simplest, most overlooked fixes for a sluggish home network. No new router, no extra spending, just a few clicks in a settings menu. If a channel switch alone doesn't fully solve your problem, pair it with our guide on how to improve your WiFi signal for additional fixes like router placement and antenna positioning. Log in, scan your surroundings, pick a cleaner channel, and give your devices the open lane they've been waiting for