To change your wifi password, log into your router's admin panel using its default IP address (usually 192.168.1.1 or 192.168.0.1), open the Wireless or WiFi settings tab, and enter a new password in the field labeled "Password," "Passphrase," or "Shared Key." The whole process takes about five minutes and works the same way across TP-Link, Netgear, Linksys, ASUS, and most ISP-issued routers. Below, I'll walk you through every step, plus how to pick a password that actually holds up.
Why You Should Change Your WiFi Password Regularly
Here's the thing nobody tells you when you unbox a new router: the factory-set password is rarely as strong as it should be, and if you've never changed it, you're leaving a door open.
This isn't a small problem, either. According to Broadband Genie's 2025 router security survey of 3,242 users, 81% of people have never changed their router's default admin password, and a related IBM analysis found that 72% have never even changed the default WiFi password itself. Those default credentials aren't secret. Websites openly catalog default logins for nearly every router brand, so anyone who knows your router's make and model can look them up in seconds.
Think about it this way. Every device that's ever connected to your network still remembers that password. Old roommates, houseguests, that contractor who was in your house last spring. All of them technically still have access unless you've rotated the credentials since.
A fresh secure home network password closes those doors instantly. It also forces every connected device to reconnect, which is a handy way to boot off anyone who shouldn't be there.
On top of that, routers using outdated wireless encryption standards like WEP are far easier to crack than ones running WPA2 or WPA3, so this is also a good moment to check which security protocol your network is using (more on that comparison below).
When It's Time for a Change
A few situations should push this to the top of your to-do list:
You've shared the password with too many people to count
Your internet feels slower than it should for no clear reason
You just bought a used or secondhand router
It's simply been a year or more since the last update
If any of those sound familiar, keep reading.
What You Need Before You Start
Before you touch any settings, gather a few basics so you're not scrambling halfway through.
You'll want a device connected to your network (laptop, phone, or tablet all work), a modern web browser like Chrome, Firefox, or Edge (check out our best productivity Chrome extensions if you're setting up a new browser anyway), and your router's admin credentials.
Finding Your Router's Login Details
Flip your router over. Most manufacturers print the default router IP address, admin username, and admin password right on a sticker on the bottom or back of the device.
If that sticker is missing or worn out, check your router's manual, or search the manufacturer's site along with your model number and "default login credentials."
Quick note: your admin password and your wifi password are two completely different things. The admin login gets you into the settings panel. The wifi password is what your devices use to join the network. People mix these up constantly, so keep that distinction in mind as you go.
Default Login Details by Brand
Since this varies quite a bit, here's a quick reference table for the most common brands:
Router Brand | Default IP Address | Default Login |
|---|---|---|
TP-Link | 192.168.0.1 or tplinkwifi.net | admin / admin (older models) |
Netgear | 192.168.1.1 | admin / password |
Linksys | 192.168.1.1 | admin / admin |
ASUS | 192.168.1.1 | admin / admin |
D-Link | 192.168.0.1 | admin / blank |
Xfinity Gateway | 10.0.0.1 | Set by provider |
If your login doesn't match this table, check the sticker on your device. This is the most reliable source, since ISPs and manufacturers frequently customize defaults.
Step-by-Step: How to Change Your WiFi Password
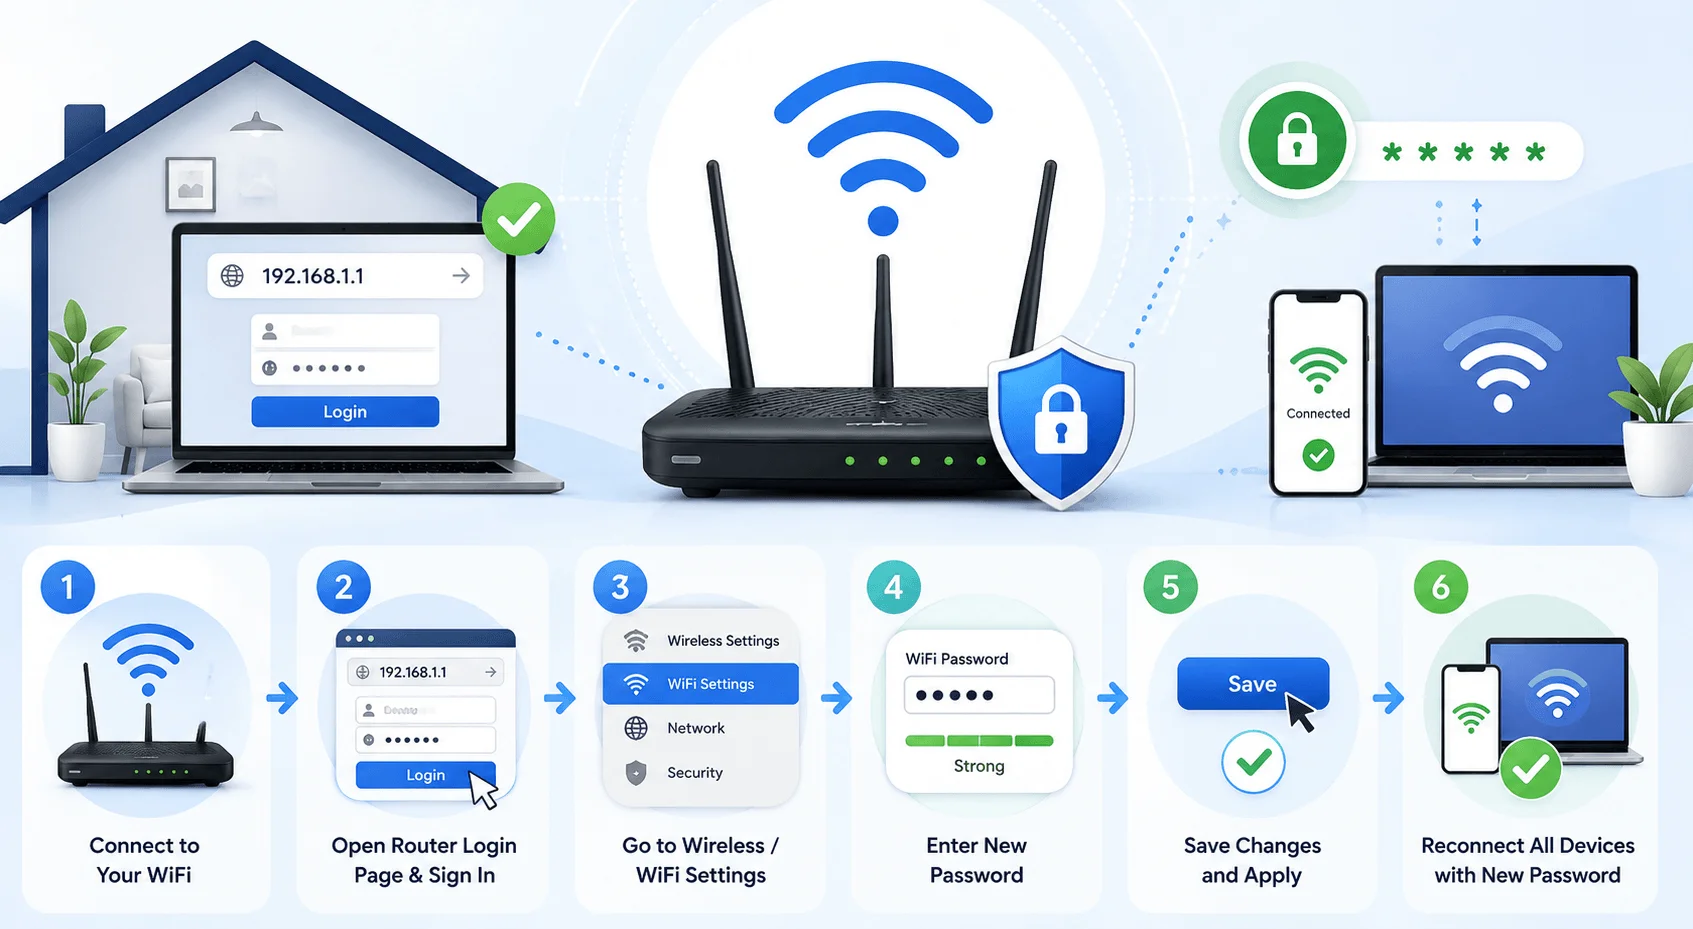
This process works whether you're on a TP-Link, Netgear, Linksys, ASUS, D-Link, or an ISP-provided gateway like Xfinity. The screens will look a little different depending on your router brand, but the steps map almost one-to-one.
Step 1: Connect to Your Router
Open a web browser on a device that's already connected to your network, either through WiFi or an Ethernet cable. An Ethernet connection is generally more stable for this kind of task, since you won't lose your session partway through if the wireless signal drops.
Step 2: Find and Enter Your Router's IP Address
Type your router's default gateway address into the browser's address bar. This is usually one of the following:
192.168.1.1
192.168.0.1
10.0.0.1
Not sure which one applies to you? 192.168.1.1 is one of the most widely used default addresses across brands like D-Link, Netgear, Cisco, Linksys, and TP-Link, so it's worth trying first.
Step 3: Log Into the Router Admin Panel
Enter the admin username and password you gathered earlier (or found in the table above). Press enter, and you should land on your router's web management page.
If the login fails, double-check for typos, make sure Caps Lock isn't on, and confirm you're using the admin credentials rather than the old wifi password by mistake.
Step 4: Locate the Wireless Settings
Look for a tab labeled Wireless, WiFi, or WLAN. On some routers this sits under an "Advanced" or "Setup" menu instead of being front and center.
If you're on an Xfinity gateway, it usually lives under "Gateway" and then "Connection." Every brand hides it slightly differently, but it's almost always there somewhere.
Step 5: Change the Password Field
Inside the wireless menu, look for a field labeled Password, Passphrase, or Shared Key. This is where the actual change happens.
Clear the existing password and type in a new one. If your router broadcasts separate 2.4GHz and 5GHz (or even 6GHz) bands, you may need to update the password for each band individually unless your router has a "Smart Connect" feature that merges them under one SSID.
Step 6: Choose a Strong Security Protocol
While you're in this menu, glance at the security type dropdown. You'll usually see options like WEP, WPA, WPA2, and on newer routers, WPA3.
Here's how they stack up:
Protocol | Security Level | Recommendation |
|---|---|---|
WEP | Very weak, crackable in minutes | Avoid entirely |
WPA | Weak, outdated | Avoid if possible |
WPA2 | Strong, widely supported | Good default choice |
WPA3 | Strongest, latest standard | Best if your devices support it |
WPA2 or WPA3 are the ones you want. WEP is outdated and considerably easier to break into, so if that's what's currently selected, switch it now.
Step 7: Save and Confirm
Click Save or Apply. Most routers will briefly restart the wireless radio, so don't panic if your connection drops for a few seconds.
Step 8: Reconnect Every Device
Once the change goes through, every device that was previously connected will need to rejoin using the new password. On most phones and laptops, this just means:
Opening WiFi settings
Selecting your network name
Entering the new password
Confirming the connection
Smart home gadgets, printers, and older devices might need to be reconnected manually one at a time, so budget a few extra minutes for that if you have a lot of them.
Choosing a Strong WiFi Password
You've made it through the technical part. Now let's talk about picking a password that's actually going to hold up.
A weak password defeats the entire purpose of this exercise. Something like "password123" or "wifi2026" takes almost no effort for automated tools to guess, so it's worth spending an extra minute here.
What Makes a Password Strong
Aim for at least 12 characters, and mix in uppercase letters, lowercase letters, numbers, and symbols. Complex passwords are dramatically harder for both humans and cracking software to predict.
A passphrase built from a few unrelated words strung together, with a number or symbol swapped in somewhere, tends to be both memorable and genuinely secure. Something you can picture in your head but a stranger couldn't easily guess.
What to Avoid
Skip anything tied to obvious personal info like birthdays, pet names, or your street address. These are the first things anyone attempting to guess your password will try.
Also steer clear of reusing a password from another account. If that password ever leaks elsewhere, your network becomes an easy target too.
Troubleshooting Common Issues
Every once in a while, something doesn't go according to plan. Here are the most common snags people run into and how to fix them.
Can't Access the Login Page
If the router's IP address won't load, first confirm you're actually connected to the router's network, either by cable or WiFi.
Try restarting your router by unplugging it, waiting about 30 seconds, and plugging it back in. This clears up a surprising number of connectivity hiccups on its own.
Forgot the Admin Password
This one's frustrating but fixable. Most routers have a small reset button, often recessed and requiring a pin or paperclip to press.
Holding it for 10 to 30 seconds triggers a factory reset, wiping your custom settings and restoring the original defaults printed on the sticker. Just know this also erases any other customizations you've made, so it's genuinely a last resort.
Devices Won't Reconnect After the Change
If a device seems stuck trying to connect with the old password, "forget" the network on that device first, then search for it again and enter the new credentials fresh. This clears out any cached login info that might be causing the conflict.
Bonus Tip: Set Up a Guest Network
While you're already in the wireless settings, it's worth setting up a guest wifi network if you haven't already.
A guest network keeps visitors off your primary connection entirely, which means they never see your main password and can't reach devices sitting on your private network. It's an easy extra layer of separation that takes almost no additional effort once you're already in the settings panel. If you're also managing what devices on your network can access, our guide on how to block websites on Chrome is a useful next step.
Frequently Asked Questions
How often should I change my wifi password?
Once every 6 to 12 months is a reasonable baseline, or immediately after moving, ending a lease with roommates, or suspecting unauthorized access.
Do I need to change the password on both the 2.4GHz and 5GHz bands?
Yes, unless your router uses a "Smart Connect" or "Band Steering" feature that combines both bands under a single network name and password.
What's the difference between WPA2 and WPA3?
WPA3 is the newer standard and offers stronger encryption and better protection against password-guessing attacks. Use WPA3 if your router and devices support it; otherwise WPA2 is still considered secure.
Will changing my wifi password disconnect my devices?
Yes, every connected device will need to be reconnected manually using the new password, including smart home gadgets, printers, and streaming devices.
What if I forgot my router's admin password?
You'll need to factory reset the router using the small reset button on the back, then log in with the original default credentials.
Is it safe to use the same wifi password as my other accounts?
No. Reusing passwords across accounts means a breach anywhere else could expose your home network too.
Does changing my wifi password improve internet speed?
It can, if unauthorized devices were previously using your bandwidth without your knowledge. Otherwise, it won't directly affect speed.
Wrapping Up
Changing your router password really does boil down to those eight steps: connect, find the IP address, log in, locate the wireless menu, update the password, pick a solid security protocol, save, and reconnect your devices.
Do this once every so often, especially after moving, after a breakup, or anytime you've shared your network with more people than you'd like to keep track of. Your home network will thank you for it.