Quick answer: To connect your Apple Pencil to iPad, you either place it on the iPad's magnetic connector (Pencil Pro / 2nd gen), plug it into the iPad's USB-C port (USB-C Pencil), or plug it into the Lightning port or an adapter (1st gen) — then tap Pair when the prompt appears. The exact method depends on which Apple Pencil generation you own.
So you just got your hands on an Apple Pencil, and now you're sitting there wondering how to connect Apple Pencil to iPad without losing your mind. I get it. You'd think Apple would make this dead simple across the board — but nope, there are different steps depending on which Apple Pencil generation you own.
Here's the good news, though.
By the end of this guide, you'll know exactly how to connect Apple Pencil to iPad, no matter which model you're rocking. I'll walk you through Apple Pencil pairing, charging, troubleshooting, pricing, and even what to do when things go sideways (because sometimes they do).
Let's dive in.
Why Connecting Your Apple Pencil Properly Actually Matters
Before we jump into the steps, let's talk about why this even matters.
Honestly? A lot of people just shove their stylus onto the iPad and expect magic to happen. And sometimes it does! But other times, you're left tapping your screen furiously wondering why nothing's happening.
The truth is, Apple Pencil pairing depends heavily on your specific iPad model and Apple Pencil generation. Mismatch the two, and you'll get stuck. Nail the process, and you'll be sketching, note-taking, and marking up PDFs in under a minute.
Trust me — once you get this right, you'll never think about it again.
(Related read: check out our Apple Pencil buying guide if you haven't purchased one yet.)
Apple Pencil Generations Compared
Before pairing anything, it helps to see the full picture side by side. Here's a schema-friendly breakdown you can scan in seconds:
Generation | Connector Type | Pairing Method | Compatible iPads | Approx. Price |
|---|---|---|---|---|
Apple Pencil (1st gen) | Lightning (or USB-C via adapter) | Plug in, tap Pair | iPad 6th–10th gen, iPad mini 5th gen, older iPad Air/Pro | ~$99 |
Apple Pencil (2nd gen) | Magnetic | Attach to side, tap Pair | iPad Pro 11"/12.9" (2018+), iPad Air 4th/5th gen, iPad mini 6th gen | ~$129 |
Apple Pencil Pro | Magnetic | Attach to side, tap Pair | iPad Pro (M4), iPad Air (M2/M3) | ~$129 |
Apple Pencil (USB-C) | USB-C | Plug in via cable, auto-pairs | iPad 10th gen, base iPad (2022+), iPad Air, iPad mini | ~$79 |
This table alone should help you figure out which Apple Pencil do I have or need — but if you want the play-by-play, keep scrolling.
Step 1: Figure Out Which Apple Pencil You Have
This is where most people get tripped up, honestly.
There are currently four main versions floating around: the Apple Pencil (1st generation), the Apple Pencil (2nd generation), the newer Apple Pencil Pro, and the Apple Pencil (USB-C) model. Each one pairs differently, so this step isn't optional — it's foundational.
How to Identify Your Apple Pencil
Look at the connector end (or lack of one):
1st generation: Has a removable cap and a Lightning connector underneath.
2nd generation / Pencil Pro: No cap. It attaches magnetically to the side of compatible iPads.
USB-C model: Has a small sliding door that reveals a USB-C connector.
If you're still unsure, Apple has a handy compatibility list that breaks down exactly which Pencil works with which iPad. Definitely check that out before moving forward — it'll save you a headache later.
Step 2: Connecting the Apple Pencil Pro or 2nd Generation
Okay, this one's actually beautiful once you get it.
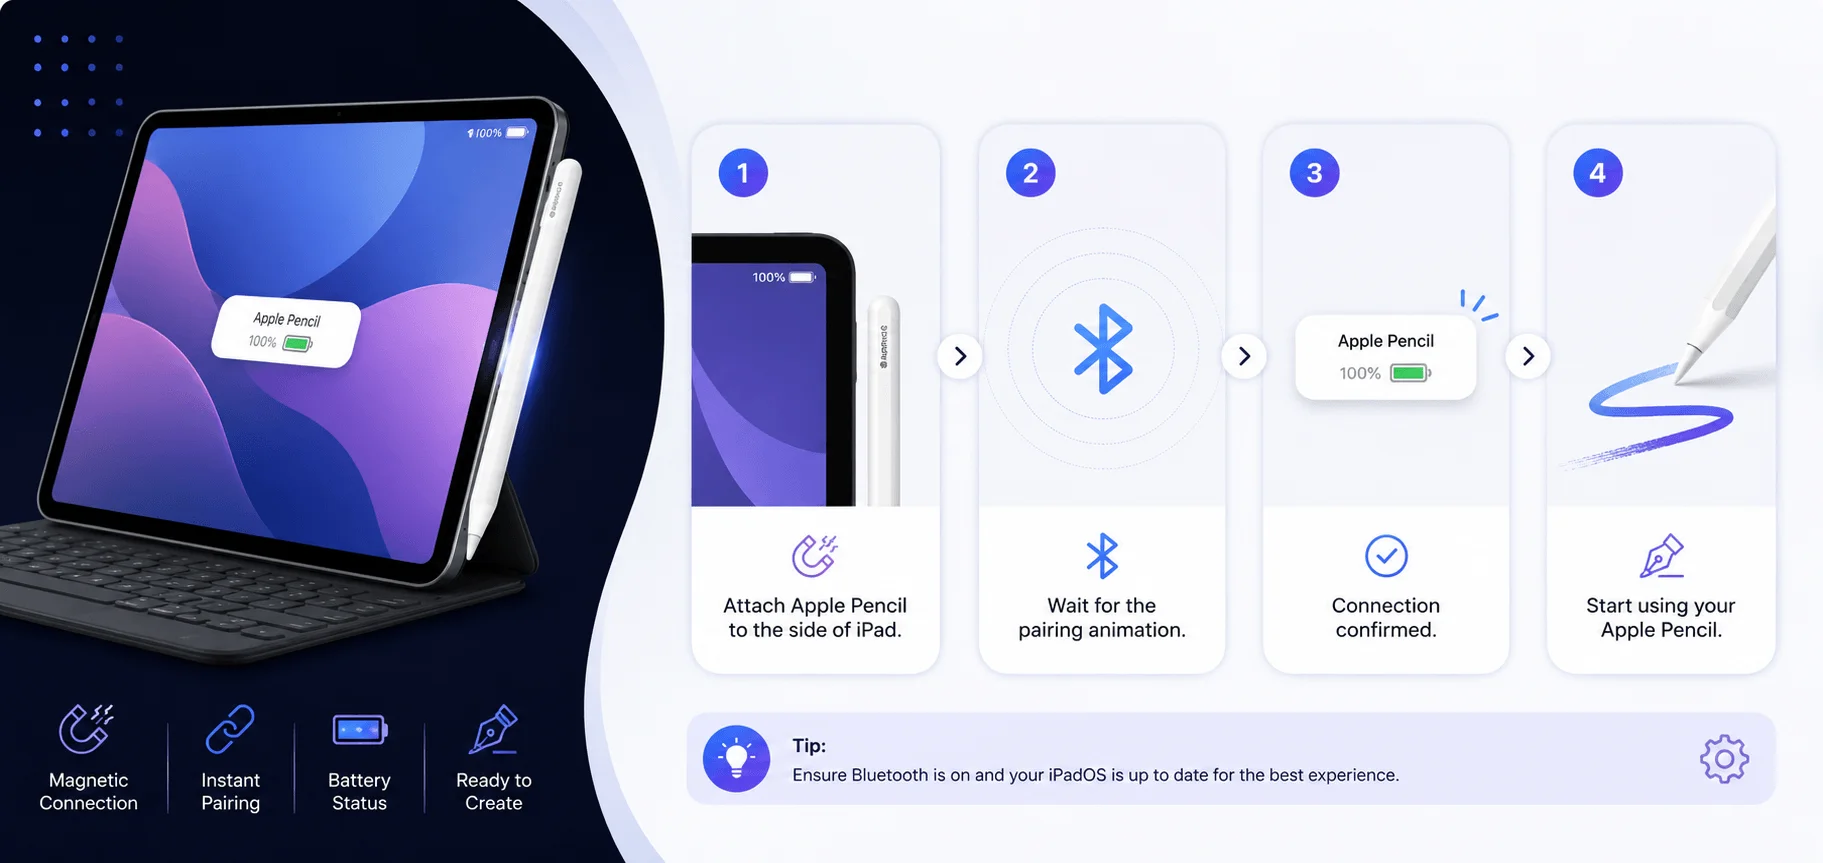
If you own the Apple Pencil Pro or the 2nd generation Apple Pencil, pairing is almost stupidly simple thanks to magnetic pairing technology. No cables, no adapters — just magnets doing their thing.
Step-by-Step:
Wake up your iPad and make sure Bluetooth is turned on (Settings > Bluetooth).
Place your Apple Pencil onto the magnetic connector on the side of your iPad.
A little card will pop up on your screen — tap Pair.
That's it. You're paired and it's already charging.
According to Apple's official support page, you simply need to center your Apple Pencil on the magnetic connector and the pairing card should appear automatically.
One thing worth noting: your Pencil will stay paired until you restart your iPad, disable Bluetooth, or connect it to a different device. So you generally only have to do this once — unless something interrupts the connection.
Step 3: Connecting the Apple Pencil (USB-C)
Now let's talk about the Apple Pencil (USB-C) — Apple's more budget-friendly option.
This one skips the fancy magnetic pairing trick and instead uses a good old-fashioned cable connection, at least for the initial setup. A little less elegant, sure, but still pretty painless.
Step-by-Step:
Slide open the little door at the end of your Apple Pencil to reveal the USB-C port.
Connect it to the USB-C charge cable that came bundled with your iPad.
Plug the other end into your iPad's USB-C port.
Wait a few seconds — pairing happens automatically.
Once paired, you can safely disconnect it.
Per Apple's guide on pairing and charging the USB-C Pencil, the Pencil pairs and begins charging the moment it's plugged into your iPad's USB-C connector. Neat, right?
Quick heads-up, though: unlike the Pro model, this version can't be magnetically charged. Multiple users have flagged this exact issue in Apple's community forums, noting that the USB-C Pencil genuinely needs the cable to charge — magnetic attachment alone won't cut it here. Good to know before you assume something's broken.
Step 4: Connecting the Apple Pencil (1st Generation)
Ah, the OG. This one's a bit more old-school, but still totally manageable.
If you've got an older iPad with a Lightning port, or a newer one requiring an adapter, here's exactly what you need to do.
For iPads With a Lightning Port:
Remove the cap from the back of your Apple Pencil.
Insert the Lightning connector directly into your iPad's Lightning port.
A pairing prompt will appear — tap Pair.
Once paired, feel free to unplug it.
As explained on Apple's support documentation, your Pencil stays connected to that specific iPad until you restart it, toggle Bluetooth off, or pair with a new device.
For Newer iPads With USB-C Ports (Like the 10th-Gen iPad):
Here's where it gets a little trickier.
Since newer iPads ditched the Lightning port, you'll need Apple's USB-C to Apple Pencil Adapter, plus a compatible cable like the USB-C Charge Cable.
Remove the cap from your Apple Pencil.
Plug the Pencil into the adapter.
Connect a USB-C cable to the other end of the adapter.
Plug the cable into your iPad.
Wait for the pairing prompt, then tap Pair.
It's a bit clunky, not gonna lie. But it works — and once it's paired, you won't need to repeat this every time.
Step 5: Checking Your Pencil's Battery and Connection Status
Once your Apple Pencil is connected, you'll probably want to keep tabs on its battery life, especially before a long sketching session or note-taking marathon.
Luckily, iPadOS makes this pretty easy to check without digging through endless menus.
How to Check:
Add the Batteries widget to your Home Screen or Today View.
Or go to Settings > Apple Pencil to see connection and battery status directly.
This little widget genuinely comes in clutch. I check mine constantly before big drawing sessions — nothing worse than your Pencil dying mid-stroke.
Step 6: Troubleshooting — When Your Apple Pencil Won't Connect
Alright, let's be real for a second. Sometimes this process just doesn't go smoothly, and that's incredibly frustrating.
If your Apple Pencil isn't pairing, don't panic. There's almost always a fix.
Try These Fixes in Order:
Remove your iPad case. This sounds silly, but according to Apple Support, a thick case can physically block the magnetic connector, preventing pairing entirely.
Check Bluetooth settings. Head to Settings > Bluetooth and confirm it's toggled on. Look under "My Devices" to see if your Pencil shows up at all.
Give it a minute to charge. If the Pair button never appears, your Pencil might just need a short charge first. Wait about 60 seconds, then try again.
Restart your iPad. Keep the Pencil connected, restart the device, and attempt pairing once more.
Confirm compatibility. This is honestly the most common issue people run into. A lot of forum posts mention getting an "Accessory Not Supported" error — which almost always means the Pencil generation doesn't match the iPad model.
If none of that works, it might genuinely be a hardware issue, and reaching out to Apple Support directly for service is your best bet.
Apple Pencil vs Third-Party Stylus: Is It Worth the Price?
Quick tangent, since I know it's on some of your minds.
Third-party styluses (like Logitech Crayon) are cheaper, but they lack pressure sensitivity, tilt shading, and the seamless magnetic pairing Apple's own Pencil offers. If you're doing serious digital art or heavy note-taking, the official Apple Pencil is generally worth the extra cost. If you just need basic navigation and light note-taking, a cheaper alternative might do the job fine.
Frequently Asked Questions
Why won't my Apple Pencil pair with my iPad?
Usually it's one of three things: a case blocking the magnetic connector, Bluetooth being off, or a compatibility mismatch between your Pencil generation and iPad model.
Can I use Apple Pencil 1st generation with a USB-C iPad?
Yes, but you'll need the USB-C to Apple Pencil Adapter plus a compatible USB-C cable — it won't plug in directly.
Does the Apple Pencil USB-C charge magnetically?
No. Despite attaching magnetically to some iPads, the USB-C Pencil only charges via the cable connection, not magnetic wireless charging.
How do I check my Apple Pencil's battery life?
Add the Batteries widget to your Home Screen, or go to Settings > Apple Pencil to see current charge status.
Do I need to re-pair my Apple Pencil every time?
No — it stays paired until you restart your iPad, turn off Bluetooth, or pair it with a different device.
Final Thoughts
Look, connecting your Apple Pencil to iPad doesn't have to be complicated — even though, admittedly, Apple could've made this a lot more consistent across generations.
But now that you've got the full picture, you should be able to pair, charge, and troubleshoot your Pencil like a total pro.
Quick recap:
Identify which Apple Pencil generation you own.
Follow the correct pairing method — magnetic, USB-C, or Lightning.
Keep an eye on battery life using the Batteries widget.
Troubleshoot using the steps above if pairing fails.
And hey, once you're all set up, go have some fun with it. Sketch something. Mark up a document. Scribble a note. If note-taking is your main use case, check out our best iPad note-taking apps roundup — it pairs perfectly with everything you just set up.